If you use Microsoft Teams for your internal communications then you can set-up the TruckDown system to send messages directly into a Teams channel of your choice. Here are the step-by-step instructions for configuring the TruckDown integration.
Set-up where you want TruckDown messages to go in Microsoft Teams
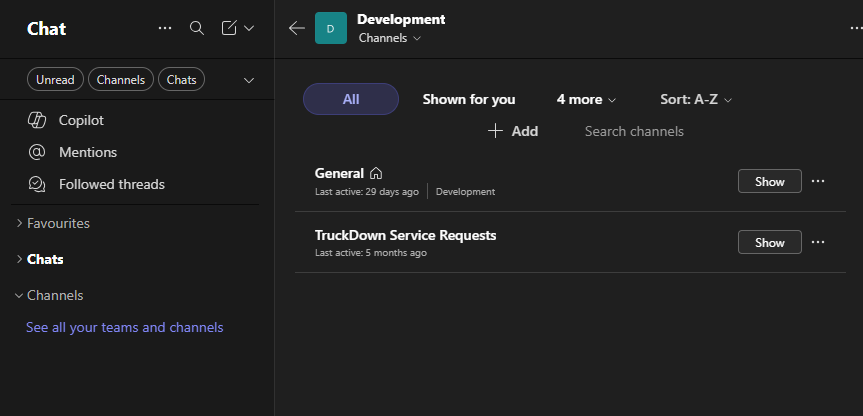
It is recommended that you set-up a dedicated channel for TruckDown messages to go to. You can create a new channel for an existing team or create a new team and channel. To view your teams and channels, go to Chat -> Channels and click on the "See all your teams and channels" link. From here you can either create a new team or select a team and view or create a new channel for that team.
Set-up the Teams webhook
Once you have a channel created/selected, click the ... menu icon for the channel and select "Workflows". Search for "webhook" in the templates and select "Send webhook alerts to a channel".
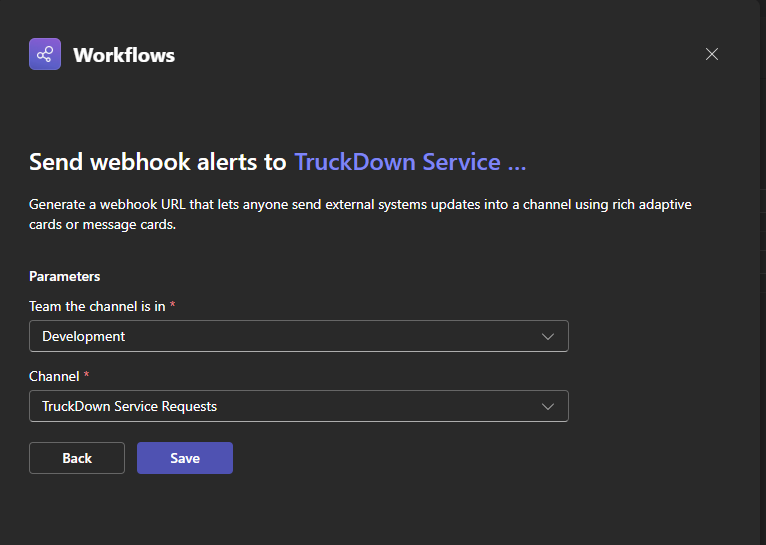
Click "Save" and once saved click "Copy webhook link" - paste the address somewhere safe as you will need it later.
Configure TruckDown to send Service Request notifications to Microsoft Teams
To configure TruckDown to send notifications to Microsoft Teams you have to add the url you copied to the list of webhooks in the notification settings with the proper Teams format.
For fleets or owner/operators, go to Admin -> Fleet/Driver Services -> Service Requests -> Notifications.
For service providers, go to Admin -> Advertising Services -> Service Requests -> Notifications.
In the Webhooks table, click on the + button. In the form, paste the url that you retrieved from Microsoft Teams and change the format to "Teams". For fleets or owner/operators, you can optionally have the system use this channel on all request for all users or just your own service requests.
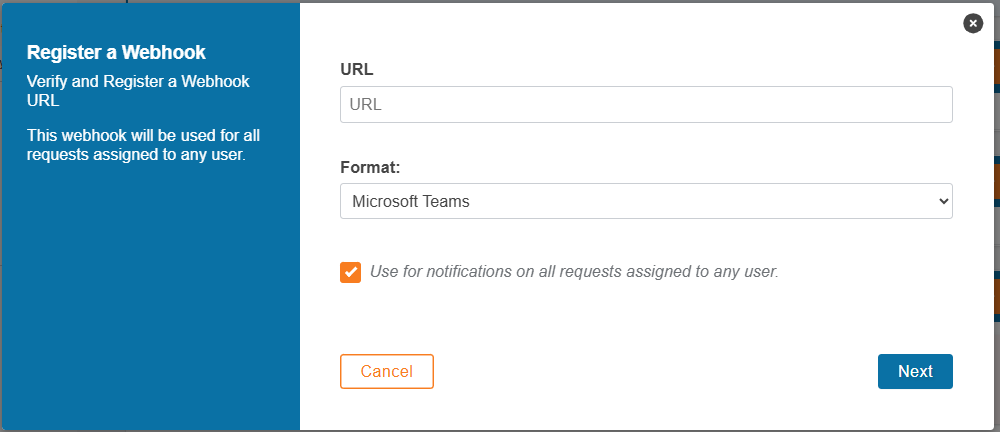
Click the "Next" button. The system will now send a verification code to the selected channel. You will need to enter this 6-digit code to verify that the integration was successful. Once completed, new notifications will be sent directly to your Teams channel.